A number of unanticipated problems can pop up after you've changed your brake pads
How to Change Brake Pads: Troubleshooting Later Problems
Knowing how to change brake pads is an important car maintenance that can save you a lot of money. But like anything with cars, if you don’t do it right, you can create even more problems. Here are few symptoms of brake pads being improperly installed.
Bob replaced his brake pads, and now he hears a squealing noise when he steps lightly on the brakes. Jason also replaced his disc pads, but now his steering wheel vibrates badly when braking, especially when decelerating from highway speeds. Sarah replaced her disc brake pads too, but now she hears a distinct “clunk” sound when braking at very slow speeds. Nobody is happy about their mechanical problems.
Let’s look at the most common oversights and see how to avoid them.
Squealing Noise When Braking
A physics teacher would probably tell you that any noise is caused by vibration. In our case, squealing is a sign that two metal parts are in direct contact, rubbing against each other and vibrating at a very high frequency. But that’s common with disc brakes. Brake parts touch and move ever so slightly, but very rapidly as the car slows down.
To prevent that noise, special high-temperature, very thick grease is supposed to be applied liberally wherever metal parts come into contact with each other in disc brakes assemblies. You don’t usually see grease on those parts when you take them apart, because years of use and repeated car washings have removed it.
That’s no excuse for all the people who gave you advice not to tell you to buy the grease and use it. The calipers have to slide back and forth slightly, but freely, when you apply and release the brakes. Put grease on those contact points to help movement and to stop the squeal.
Likewise, where the outer disc pad rests against the caliper, apply a dab of grease to those two or three contact areas. Not too much, or it will run out and look bad through your nice wheels.
The inner pad, too, where the caliper piston pushes against it needs a thin ring of grease applied to it to deaden the vibrations. Just clean everything off well and apply the special grease. Do not use wheel bearing grease or chassis grease, as it will melt under the extreme heat of braking and really make a mess.
The Steering Wheel Shakes When Braking
Jason did not have his front rotors resurfaced before he put his new disc pads on. Or if he did (good for him for being thorough) the parts store did not do it correctly.
How so? Before the disc rotors are mounted on the cutting lathe the mounting surfaces have to be sanded or wire brushed very thoroughly to remove the built-up rust and corrosion. If not, the rotor will not mount correctly to the lathe, and it will be machined out of true, causing the wobble.
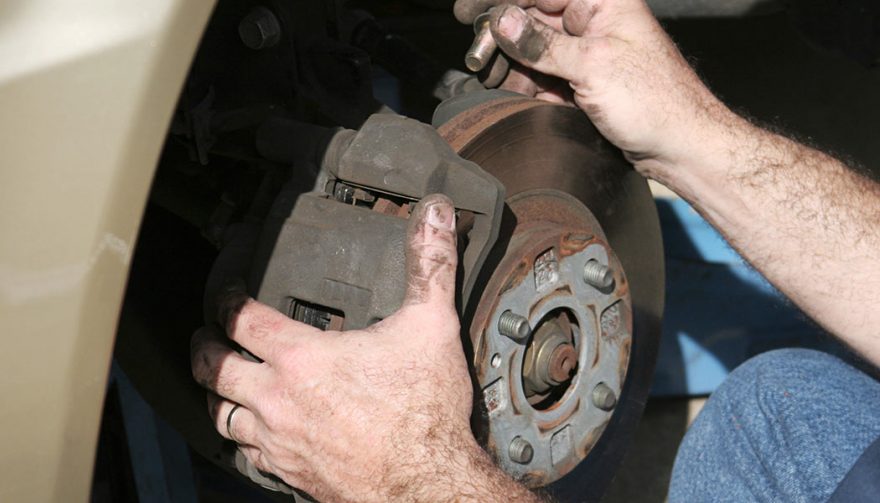
Don’t depend on the parts store to do the cleaning step. Look at the disc rotor in two places, where the wheel presses against it, and on the back side, where it presses against the bearing hub, and get those areas extremely smooth and clean.
No, you don’t have to put grease on those two surfaces, but that was a good question. The rotor is sandwiched tightly between the wheel and hub, so it can’t vibrate. Any grease you place there will sling out from centrifugal force and ruin your new brake pads, and greatly hinder your cars stopping ability as well. Be careful, and be clean, when you work on brakes.
A Clunk Noise When Stepping on the Brakes
Back the car out of your driveway, step on the brake pedal, and hear a distinct “clunk.” Go forward a few feet, brake again, and you hear that same thing. The noise wasn’t there before you replaced the pads.
Searching the forums for your brand and model of car will probably yield tons of people claiming to have the solution. The fixes could range from replacing worn steering parts to tightening loose motor mounts to changing bad suspension bushings. Ignore the complex, and go for the simplest solution. That’s a good lesson that arises repeatedly when working on cars.
Just like Bob didn’t clean, wire brush and polish all the little contact surfaces that allow brake calipers to move freely under braking, and didn’t apply the high-temperature grease, Sarah also skipped that step. Nobody had warned her.
The dry parts don’t move freely, so they bind up under pressure of braking, then pop loose, causing the clunk noise. Do yourself a favor, just take everything back apart, and clean and grease it all properly. The clunking should stop.
Fun Facts
Part of knowing how to change brake pads means having the right tools. If you need special Allen wrenches or big Torx sockets to remove the disc calipers, buy the best quality tools you can find. Those bolts are often frozen in place and can break cheap tools when you try to loosen them.
If the rotors are worn with ridges, that can prevent you from getting the old pads out. No problem. Loosen the caliper bleeder screw and gently push the pads back slightly, just enough to get them out. Otherwise, if you force things, you could break things. Remember, other people have gone before you on the brake repair journey.
The caliper pistons have to be pushed back to allow room for the brand new, thick disc pads. Don’t just push them back. That forces all the old brake fluid and corrosion that collects in the calipers back up into the delicate master cylinder. Dirt in the master cylinder can cause a sudden and complete loss of braking. It will allow the pedal to bypass and sink down to the floor when you step on it. That really gets your heart beating fast. How to avoid that trouble?
Open the caliper bleeder screw, and push the piston back slowly, letting the brake fluid escape into a handy drain pan. It’s a little more time consuming, but that is the safe way to replace your disc pads. You might have to bleed the brakes afterward, and for that its better and safer to use a pressure bleeder.


